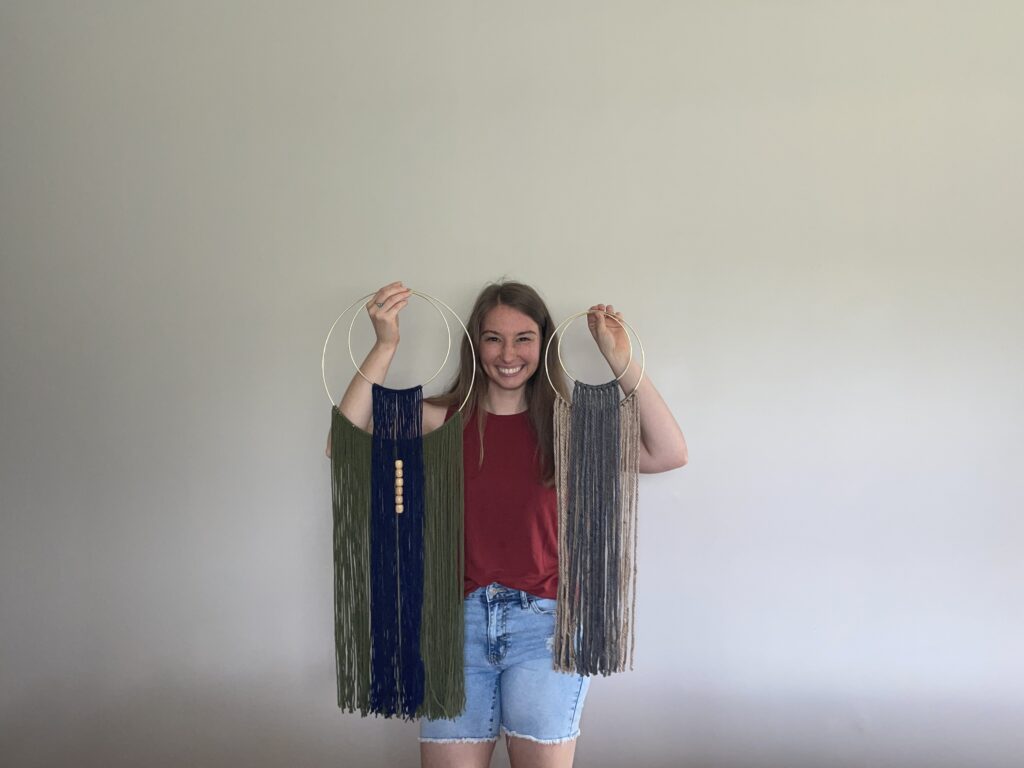
Easy DIY Macrame Hoop Wall Hanging

Anyone can make this beautiful DIY macrame hoop wall hanging with only 4 things. To make this project you’ll need: cord, beads and hoops. This DIY project is simple, fun to make and it will make your home feel even more beautiful!
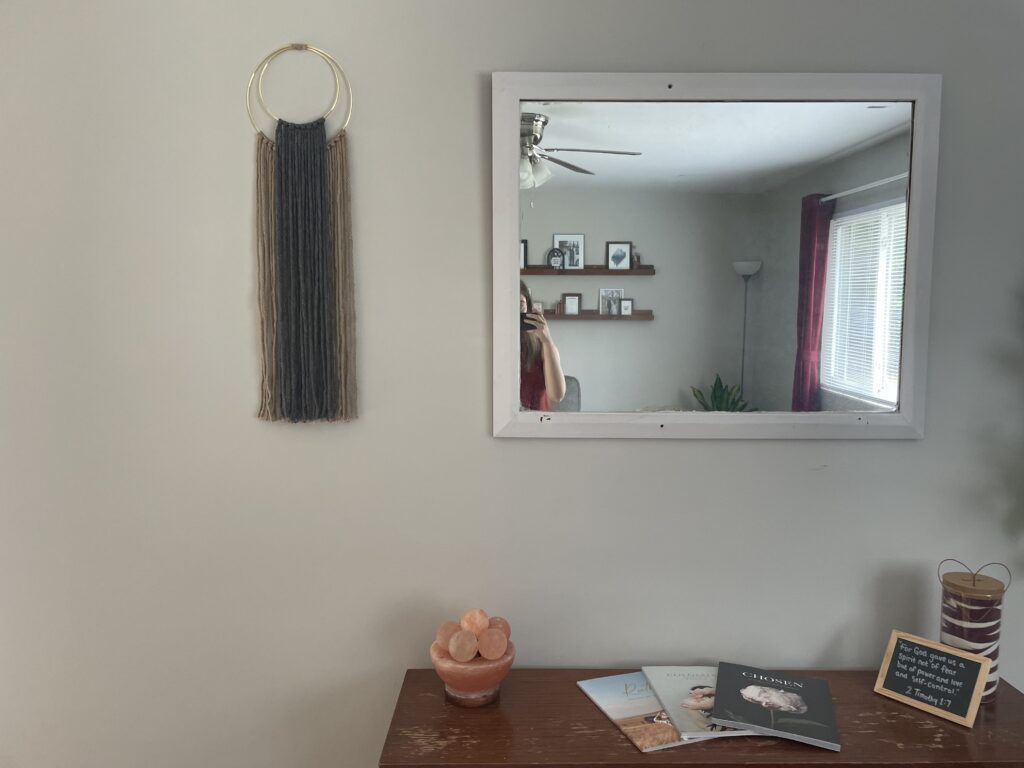
Whether you are decorating a new home or freshening up one you’ve already decorated, this macrame hoop wall hanging is a simple and cute way to add a little wall decor to any space. You can add a splash of color to your kids room, place a pretty accent over an entry table, or even put it in your bedroom like I did.
Slowing down and taking time to create something can be tough for some of us busy bodies (I’m talking to me *facepalm*) but being intentional to slow down and create is one of the best things you can do for yourself and your family. You will give yourself time to disconnect from stressors, create something beautiful, and complete something you can look at daily. I hope you’ll find this diy project to not only be a cute wall decoration but also something you enjoy doing that will in turn, help you be the best version of you.
Skill level: Beginner
If you have never done macrame before, this will be perfect for you. I enjoy DIY crafts but I do not like complicated crafts so I was excited to create something simple that also looked pretty.
There had been a blank space in my bedroom for a while and I was just waiting to find the right piece to fill it with. I did not want a picture or anything too elaborate. When I discovered macrame hoop wall hangings I knew that was what I wanted in that spot.
This simple DIY macrame project also makes for a great gift. It is really inexpensive to make and it will make your friends and family feel special because you handmade them a gift. Win, win situation. If you would rather watch a video check out my DIY Macrame Wall Hanging Tutorial Video below.
Let’s get into it…
Tools:
- Scissors
- Measuring Tape/Ruler
- Hot glue gun
- Masking tape
Materials:
- 4mm Macrame Cord (if you cannot find macrame cord you can use colored yarn)
- Two hoops
- Wood beads (optional)
- String (jute) to attach hoops
Note about the cord: You can use as many colors as you’d like. I used two but you could make a rainbow or do it all the same color. Keep that in mind with buying your macrame cord.
Instructions:
Step one:
The first thing you should do is plug in the hot glue gun so it is warmed up when you need it.
Next, you will start by measuring and cutting the macrame cord to the desired length. You will be folding the cord in half so you will want to double the desired length when cutting the cord.
Here are the measurements I used:
Tan Cord – Cut 20 strips 48 inches long
Gray Cord – Cut 10 strips 50 inches long
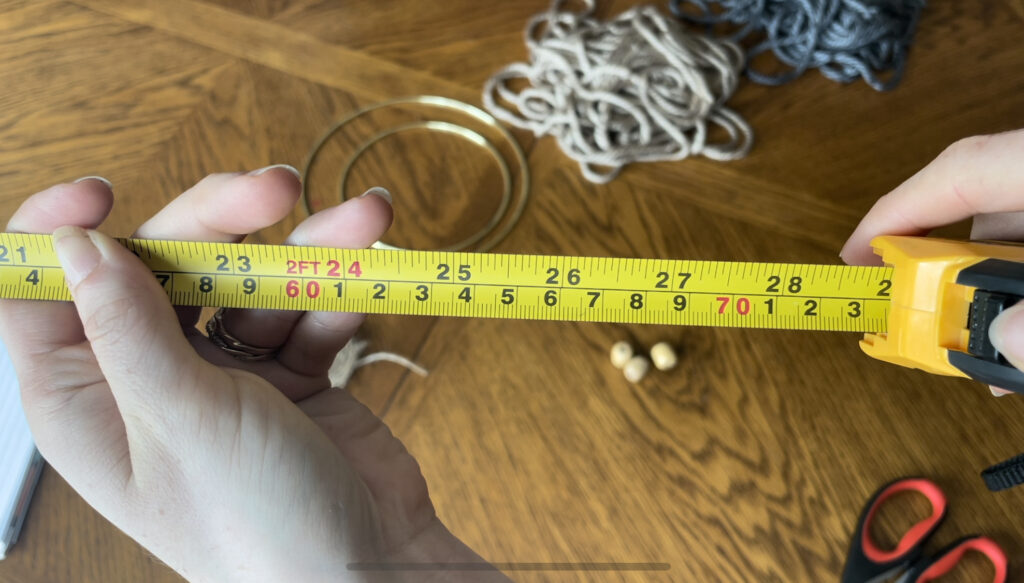
You do not need to be super exact with these measurements because you will trim them at the end to all be the same length. If you are using smaller hoops or have a smaller space to fill you might want to shorten the cord to more of the 30-40 inch range.
I would recommend cutting longer than you think so that if it is too long you can just trim it. You can always take away but you can’t add on!
Step Two:
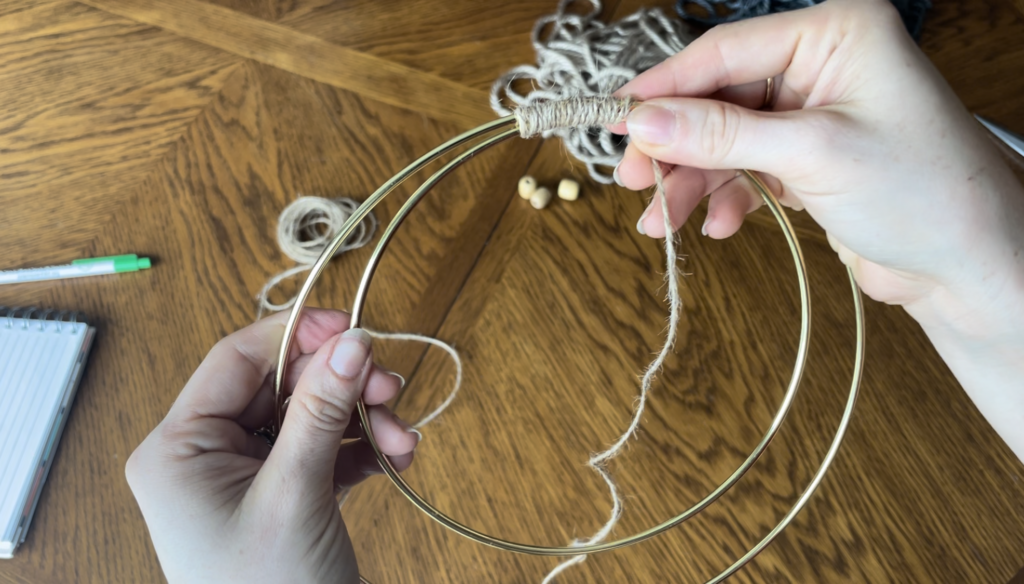
After you have everything cut, place the cord to the side and get out the hoops.
Position the hoops as pictured below:
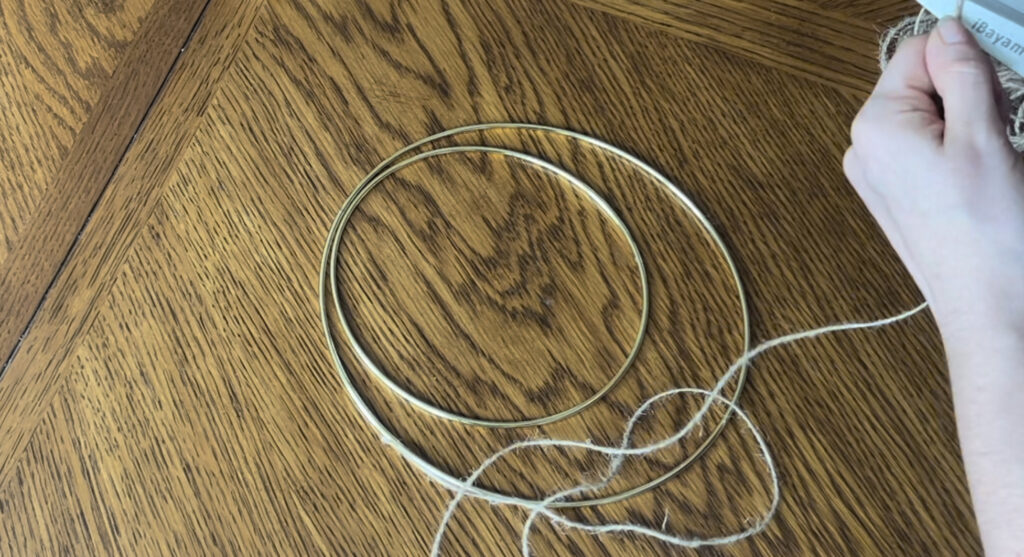
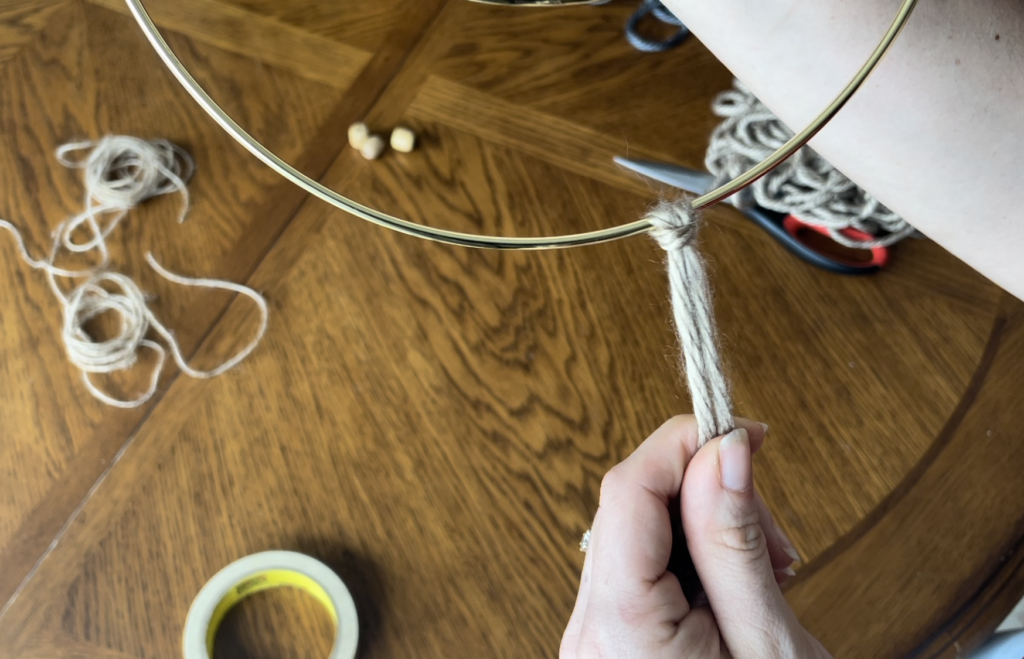
Take some string and wrap it around the top of the hoops to secure their position. Use a hot glue gun to attach the string to the hoops. I have used jute cord and twine before. Both of these strings work well. You could use fishing line if you wanted this part to be clear.
Step Three:
Here comes the fun part! Start with your shorter cord first. For me, that was the 48 inch cord. You will use this on the bigger hoop. Next you will take each cord and loop one Lark’s head knot.
Lark’s head knot: fold cord in half, create a loop over the hoop, pull the remaining cord (both halves) through the loop and pull to secure.
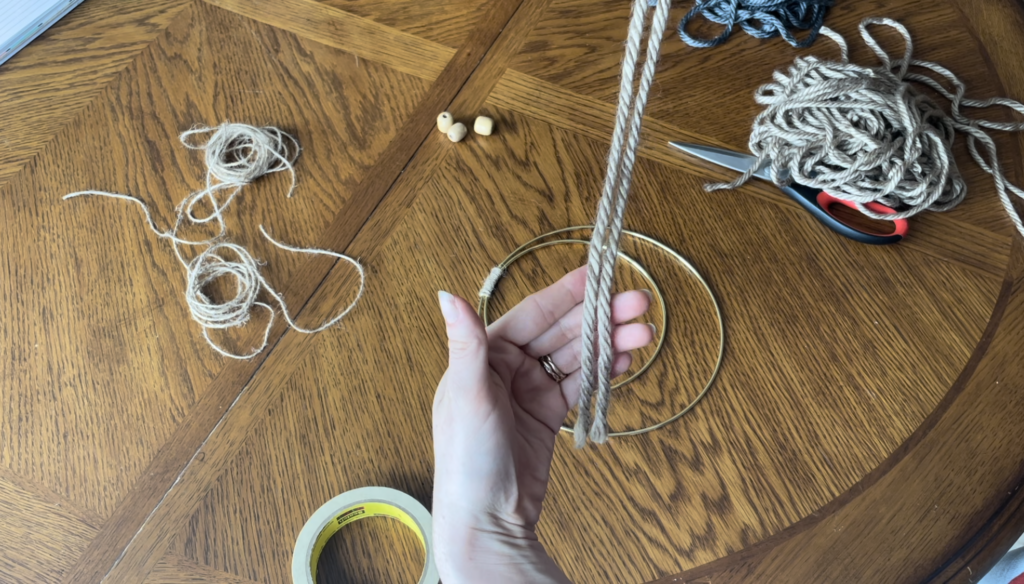

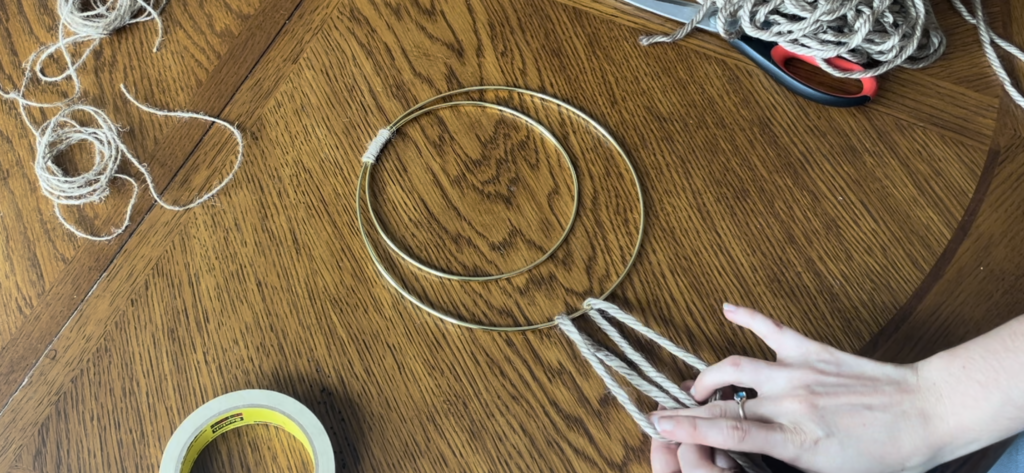
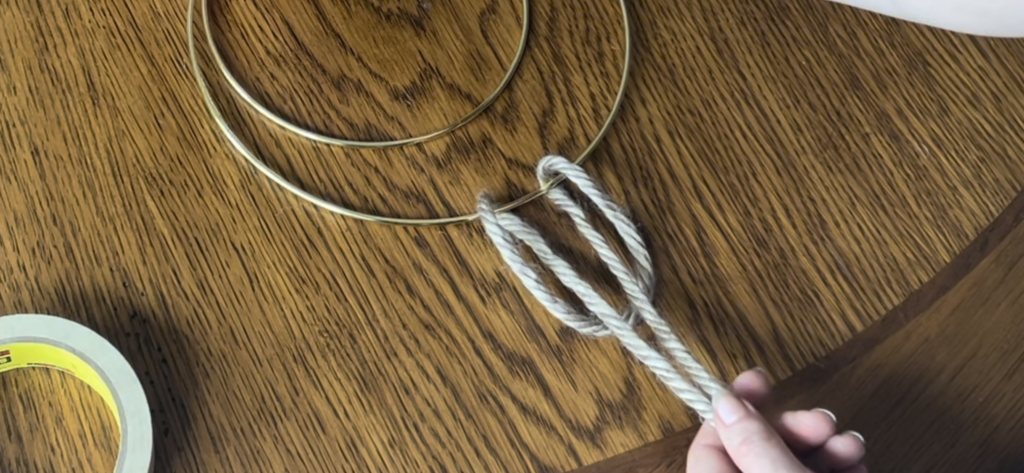
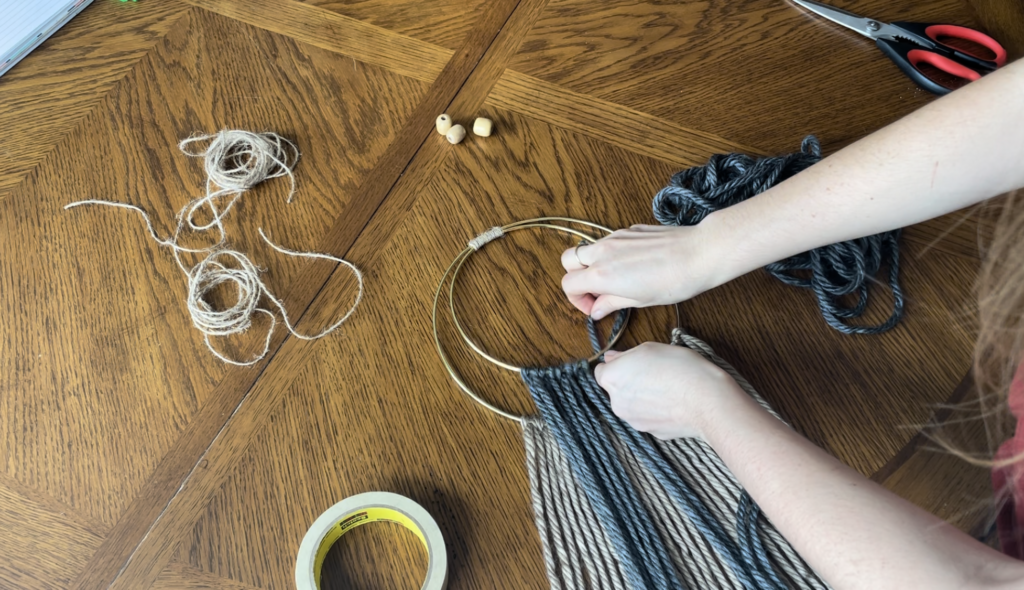
Complete the Lark’s head knot with each cord until you have filled the larger hoop to your liking.
After you are finished with the shorter cord, do the same thing with the longer cord on the smaller hoop.
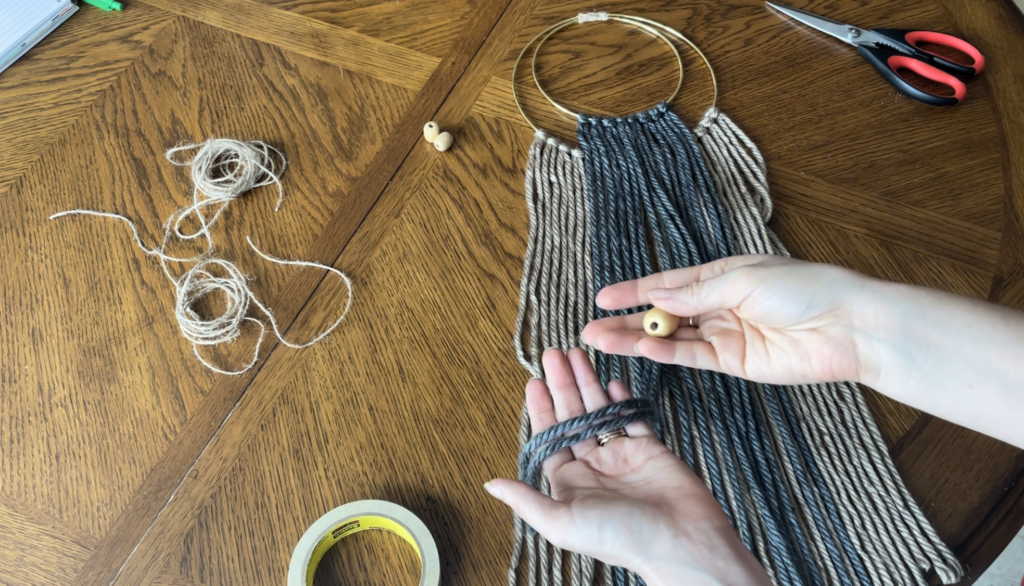
Step Four (Optional):
Now it’s time to add the wooden beads. If you like it without the wooden beads you can skip this step.
Gather a few of the cords in the center of the smaller hoop. Slide a few (5-6) wooden beads up to an inch or two below the hoop. I did not need to tie a knot at the bottom to secure the beads. They stayed put for me but if you are concerned you can tie a knot below the last bead to secure them. You might need a needle or a something small to help get the cord through the hole if it seems too small.
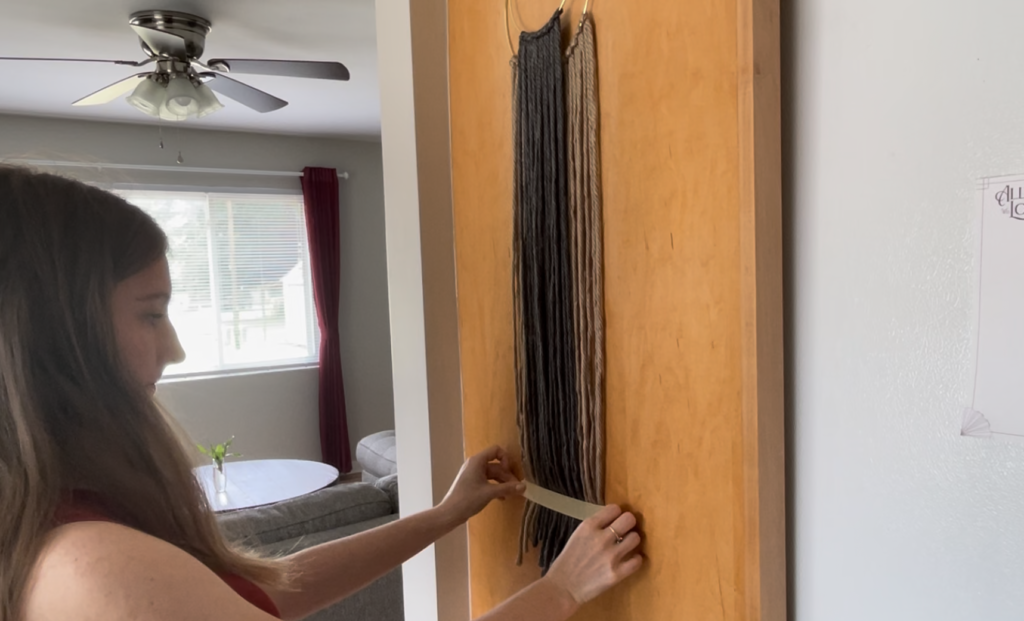
Step Five:
Take your beautiful macrame hoop wall hanging and lay it on the floor or go ahead and hang it on your wall. If you want to go ahead and hang it, you can use a small screw or nail, you do not need anything fancy to make it stay up.
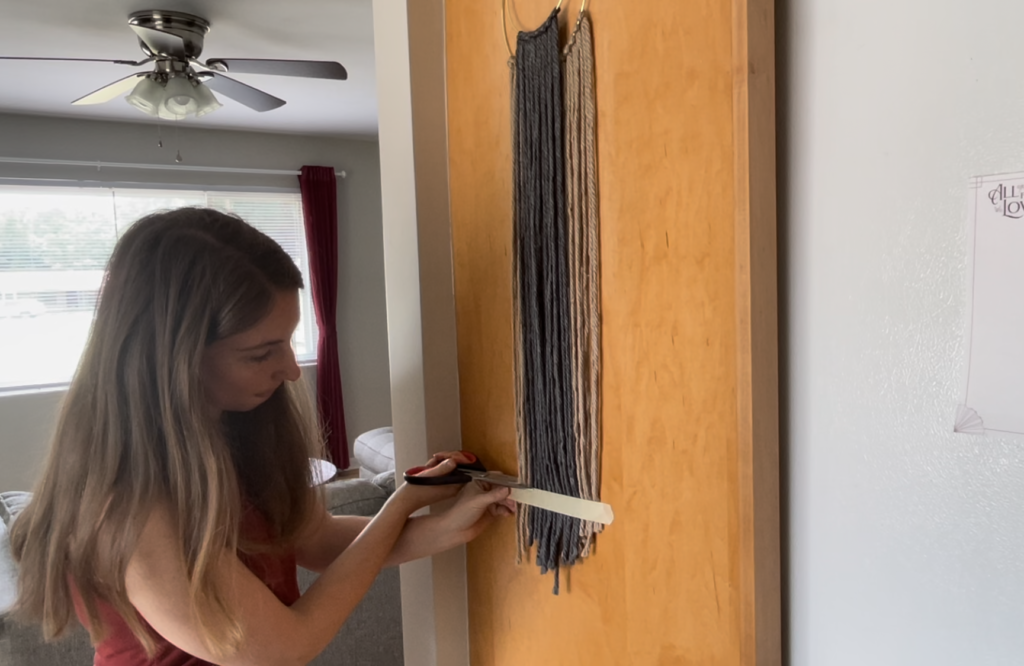
Straighten out the cords and grab the masking tape.
Take the masking tape and cut a piece the width of your wall hanging. Place the tape as straight as you can at the base of the cords.
Use scissors to cut above the tape line. This will even out all your cords and make them hang in a straight line.
That’s it, you have now created a beautiful diy macrame piece of art!
TIPS:
- Cut one cord and try it out on the hoop before you cut a bunch of strips to make sure you like the length.
- You can use yarn if you cannot find any macrame cord. I made one with yarn and it turned out just fine.
- Give yourself time to make this project. It is super easy but cutting all the cords can take a little time.
Comment below and let me know how your DIY macrame wall hanging turned out! I can’t wait to read about it.